- Pylon CLI是什么
- 它的功能
- 它的优势
- 配置 config
- 自定义构建命令
- 自定义运行命令
- 准备工作
- 安装依赖
- 安装CLI
- 在Pylon上开发你的第一个应用
- 创建开发环境
- 启动开发环境
- 使用 IDE 连接环境编码
- 暂停开发环境
- 删除开发环境
Pylon CLI
Pylon CLI是什么
Pylon CLI是在本地管控Pylon开发环境的客户端工具。
它的功能
- 通过Git仓库地址快速在本地搭建开发环境
- 管理所有本地创建的开发环境
它的优势
- 操作成本低,一个命令即可在本地搭建开发环境
- 本地创建的开发环境不消耗额外资源,零成本使用
配置 config
要开始使用 Pylon,你需要在项目里创建一个.pylon文件夹并在其中创建一个config.yml文件。
image:registry: node:16.13.1-stretchnetwork:ports:- 8080:8080
自定义构建命令
你可以在config.yml里定义build自定义构建应用的命令。
build:command: npm install
自定义运行命令
你可以在config.yml里定义run自定义应用启动的命令。
run:command: npm start
准备工作
安装依赖
需在计算机上安装以下工具和扩展:
安装CLI
在使用前请下载并安装CLI(版本号:0.0.1):
MacOS
Linux
Windows
根据如下命令安装CLI:
MacOS/Linux:
# It allows executing file as program$ chmod +x /path/to/pylon# if you don't have /usr/local/bin/ folder$ sudo mkdir -p -m 775 /usr/local/bin$ echo 'export PATH=$PATH:/usr/local/bin' >> $HOME/.bash_profile# Move pylon to /usr/local/$ sudo cp /path/to/pylon /usr/local/bin/# Check if pylon works$ pylon -v
Windows:
1.下载pylon文件
# Download the file$ curl -LO "https://static01.teamcode.com/packages/pylon/beta-0.0.1/pylon-window-x86.exe"
2.将文件的路径添加到PATH
在Pylon上开发你的第一个应用
创建开发环境
通过指定一个Git项目地址,你就可以通过Pylon创建一个运行在本地的开发环境。
$ pylon create https://github.com/ninemarks/gatsby-starter-blogGathering Facts...config.yaml Detectedyaml {Image:{Registry:node:16.13.1-stretch Dockerfile:} Network:{Ports:[8080:8080]} Build:{Command:} Run:{Command:}}Start Building Dev ContainerStep 1/9 : FROM node:16.13.1-stretch---> 8c1751caae47Step 2/9 : USER root---> Using cache---> fbce63479b11Step 3/9 : ADD ./layer /layer---> Using cache---> c4e7e5c4ef17Step 4/9 : RUN chmod u+x -R /layer && /layer/detect-distro.sh && rm -rf /layer && mkdir -p /workspace && chown -R teamcode:teamcode /workspace---> Using cache---> 3219e2329d95Step 5/9 : WORKDIR /workspace---> Using cache---> acf188028572Step 6/9 : VOLUME ["/workspace", "/home/teamcode"]---> Using cache---> ccb682a55ee1Step 7/9 : USER teamcode---> Using cache---> 6951e1b504b2Step 8/9 : LABEL pylon.git-url=https://github.com/ninemarks/gatsby-starter-blog.git---> Using cache---> dd7bb42de52aStep 9/9 : LABEL pylon.name=gatsby-starter-blog---> Using cache---> c41ccf98c5cfSuccessfully built c41ccf98c5cfSuccessfully tagged registry.teamcode.com/pylon/gatsby-starter-blog:latestError response from daemon: Conflict. The container name "/gatsby-starter-blog" is already in use by container "5592dd5a9dbce2652643b95a4696fb314114cb20fac231ac9306a3c8d4fc803d". You have to remove (or rename) that container to be able to reuse that name.
启动开发环境
当你创建完了开发环境之后,你可以启动该开发环境。
$ pylon start --name=gatsby-starter-blogDev Container StartedInit Script Executed
使用 IDE 连接环境编码
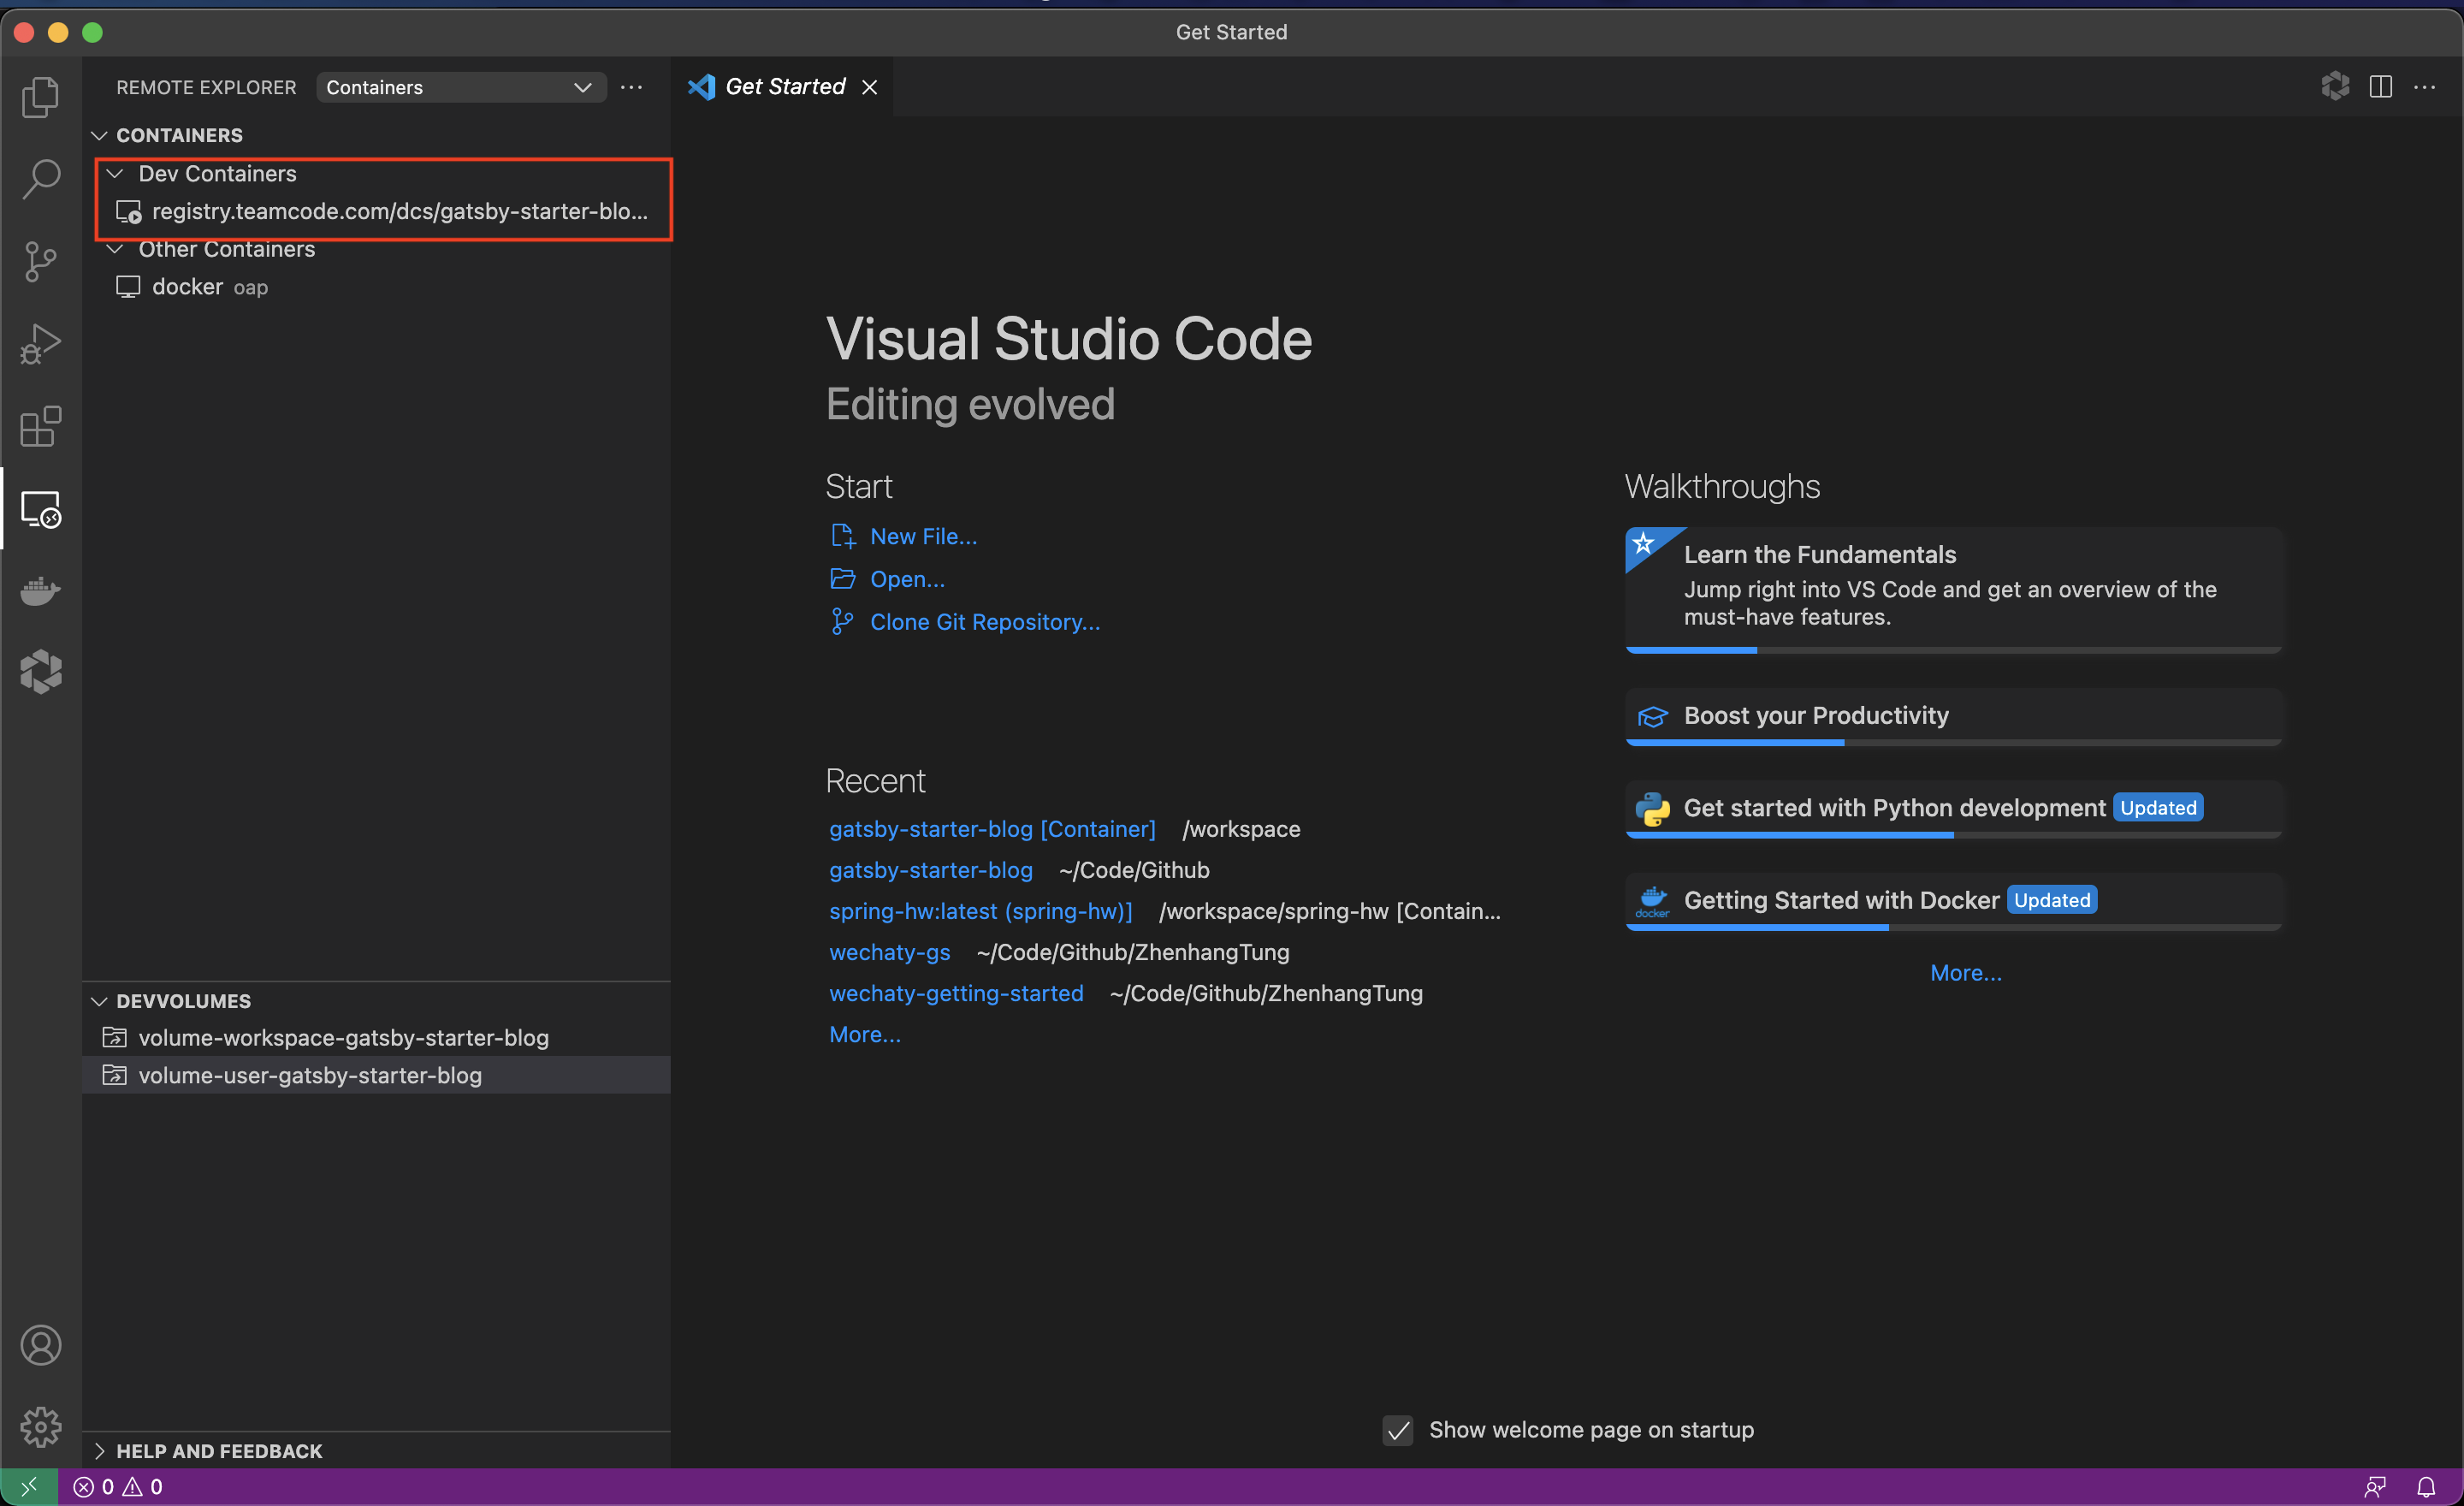
VSCode
打开 VSCode 之后进入remote container,选择创建的 container
打开此项目开始编码
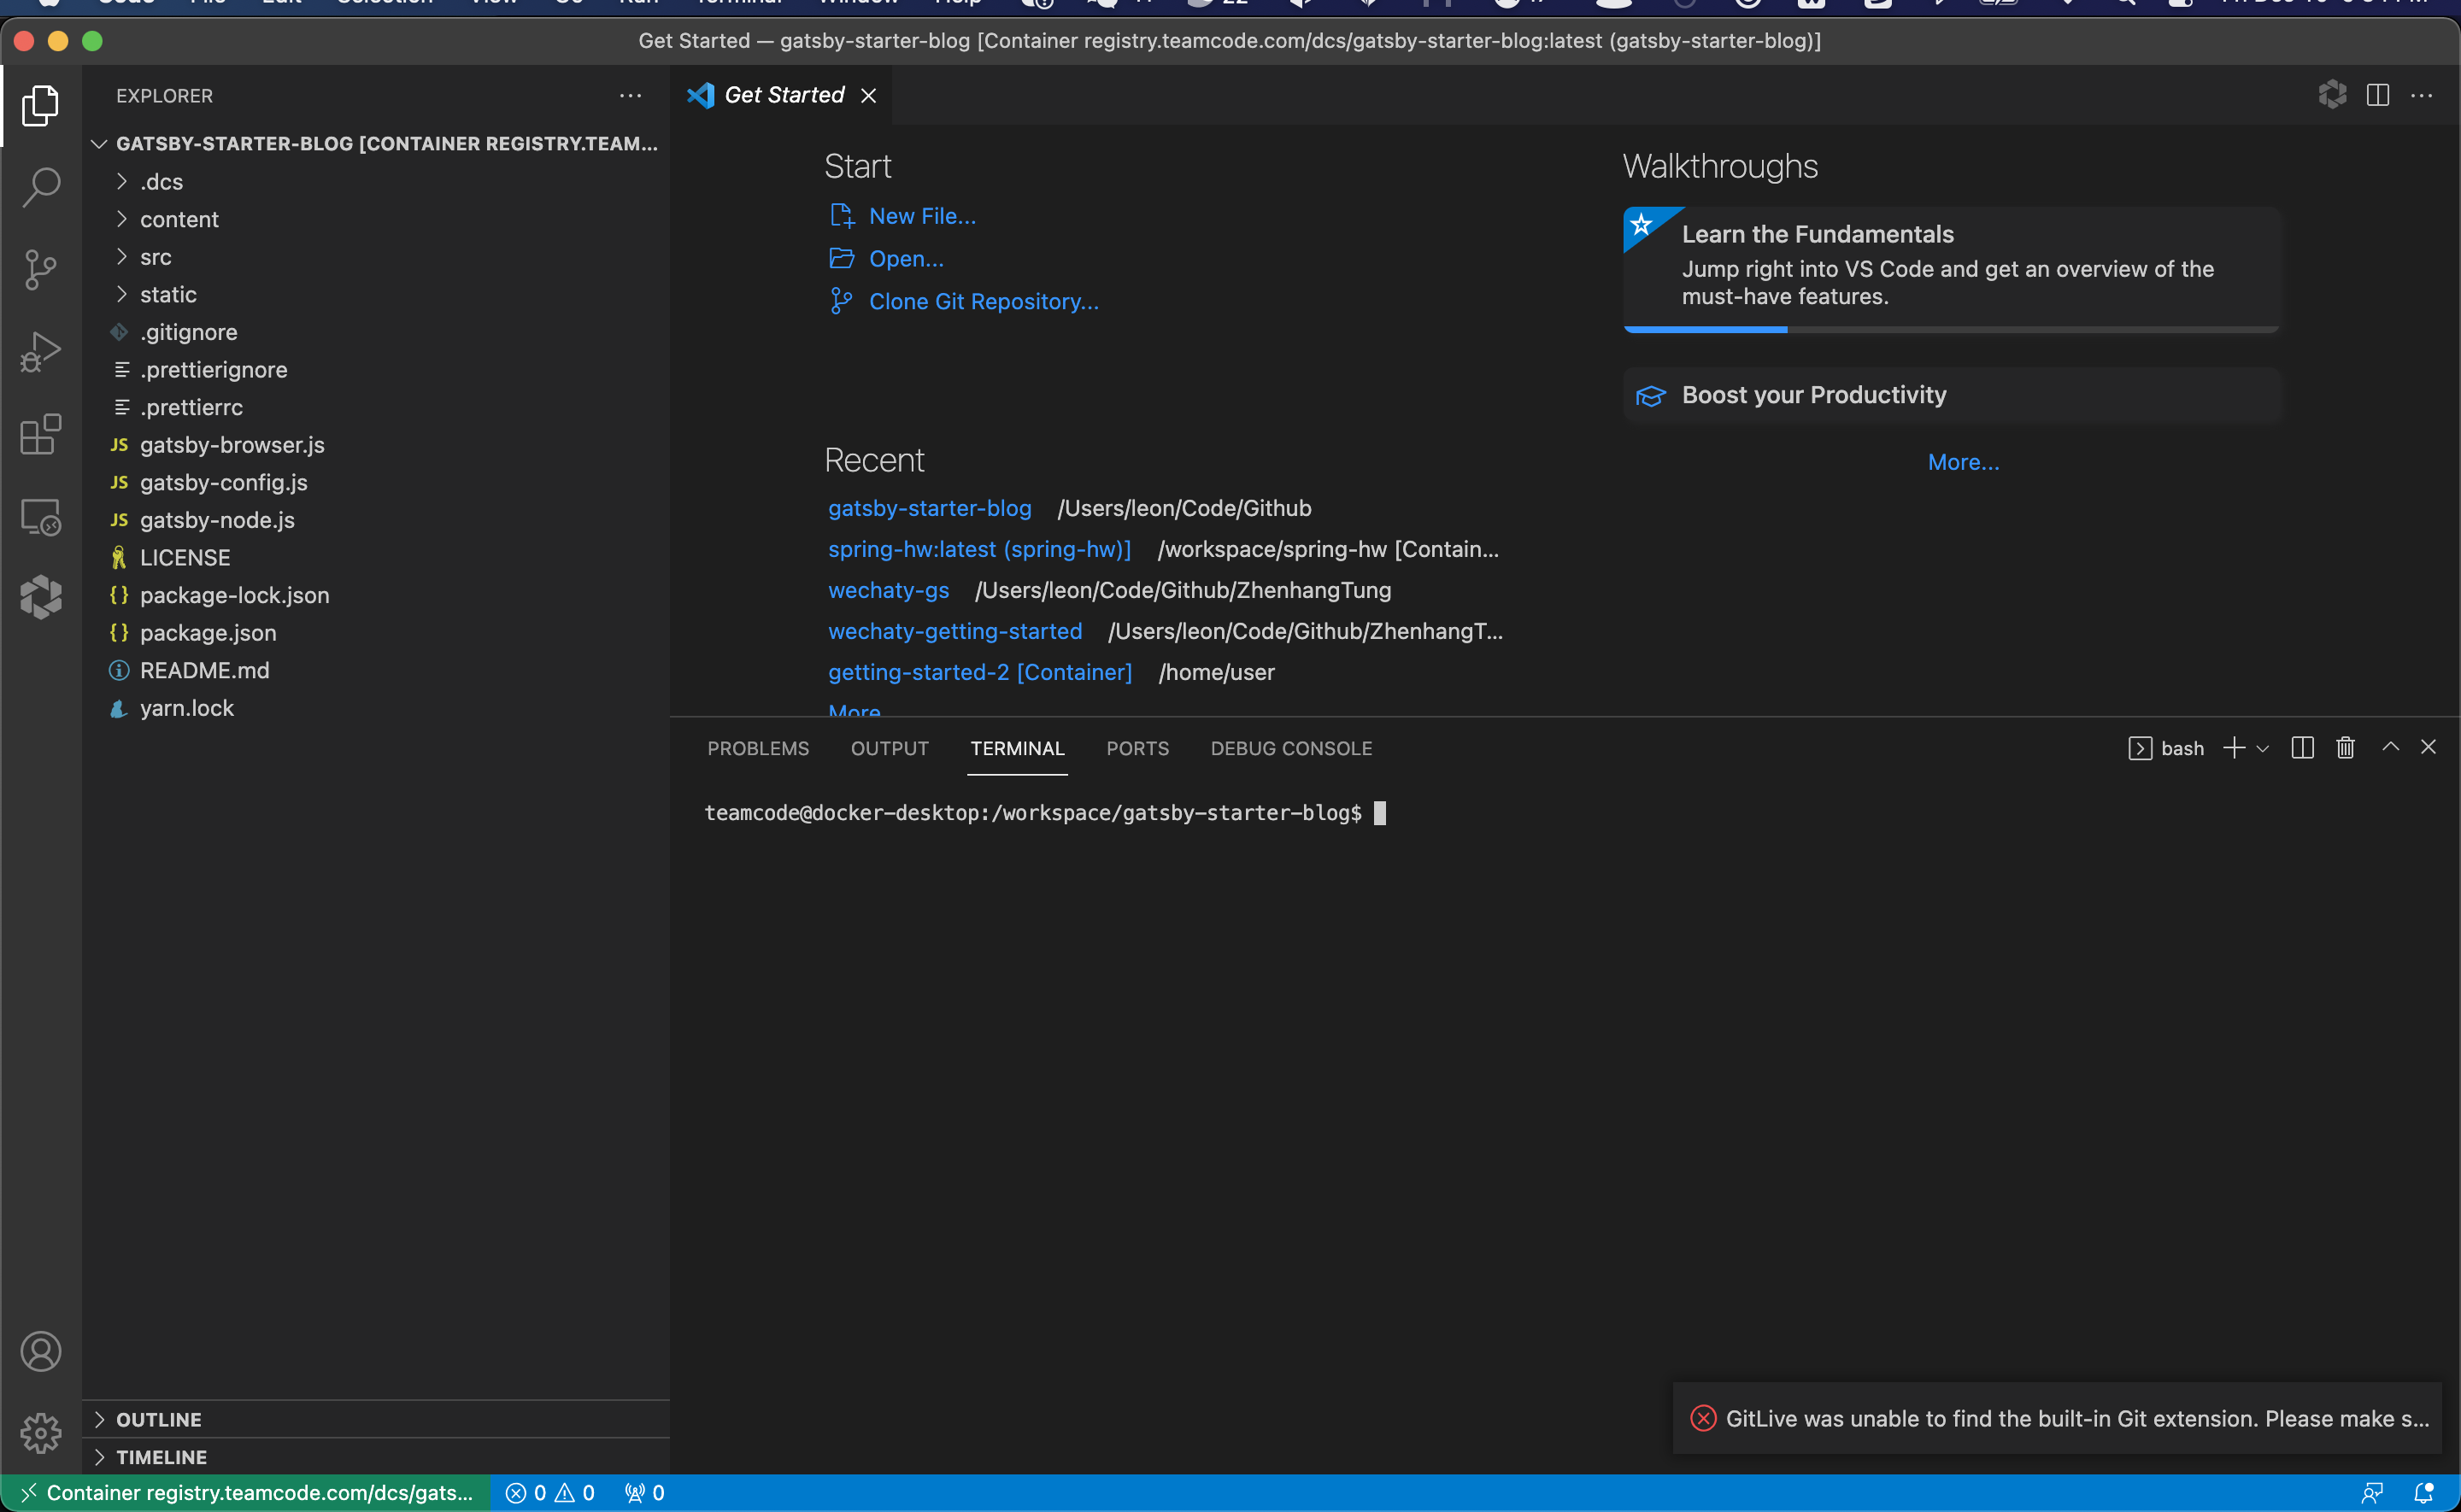
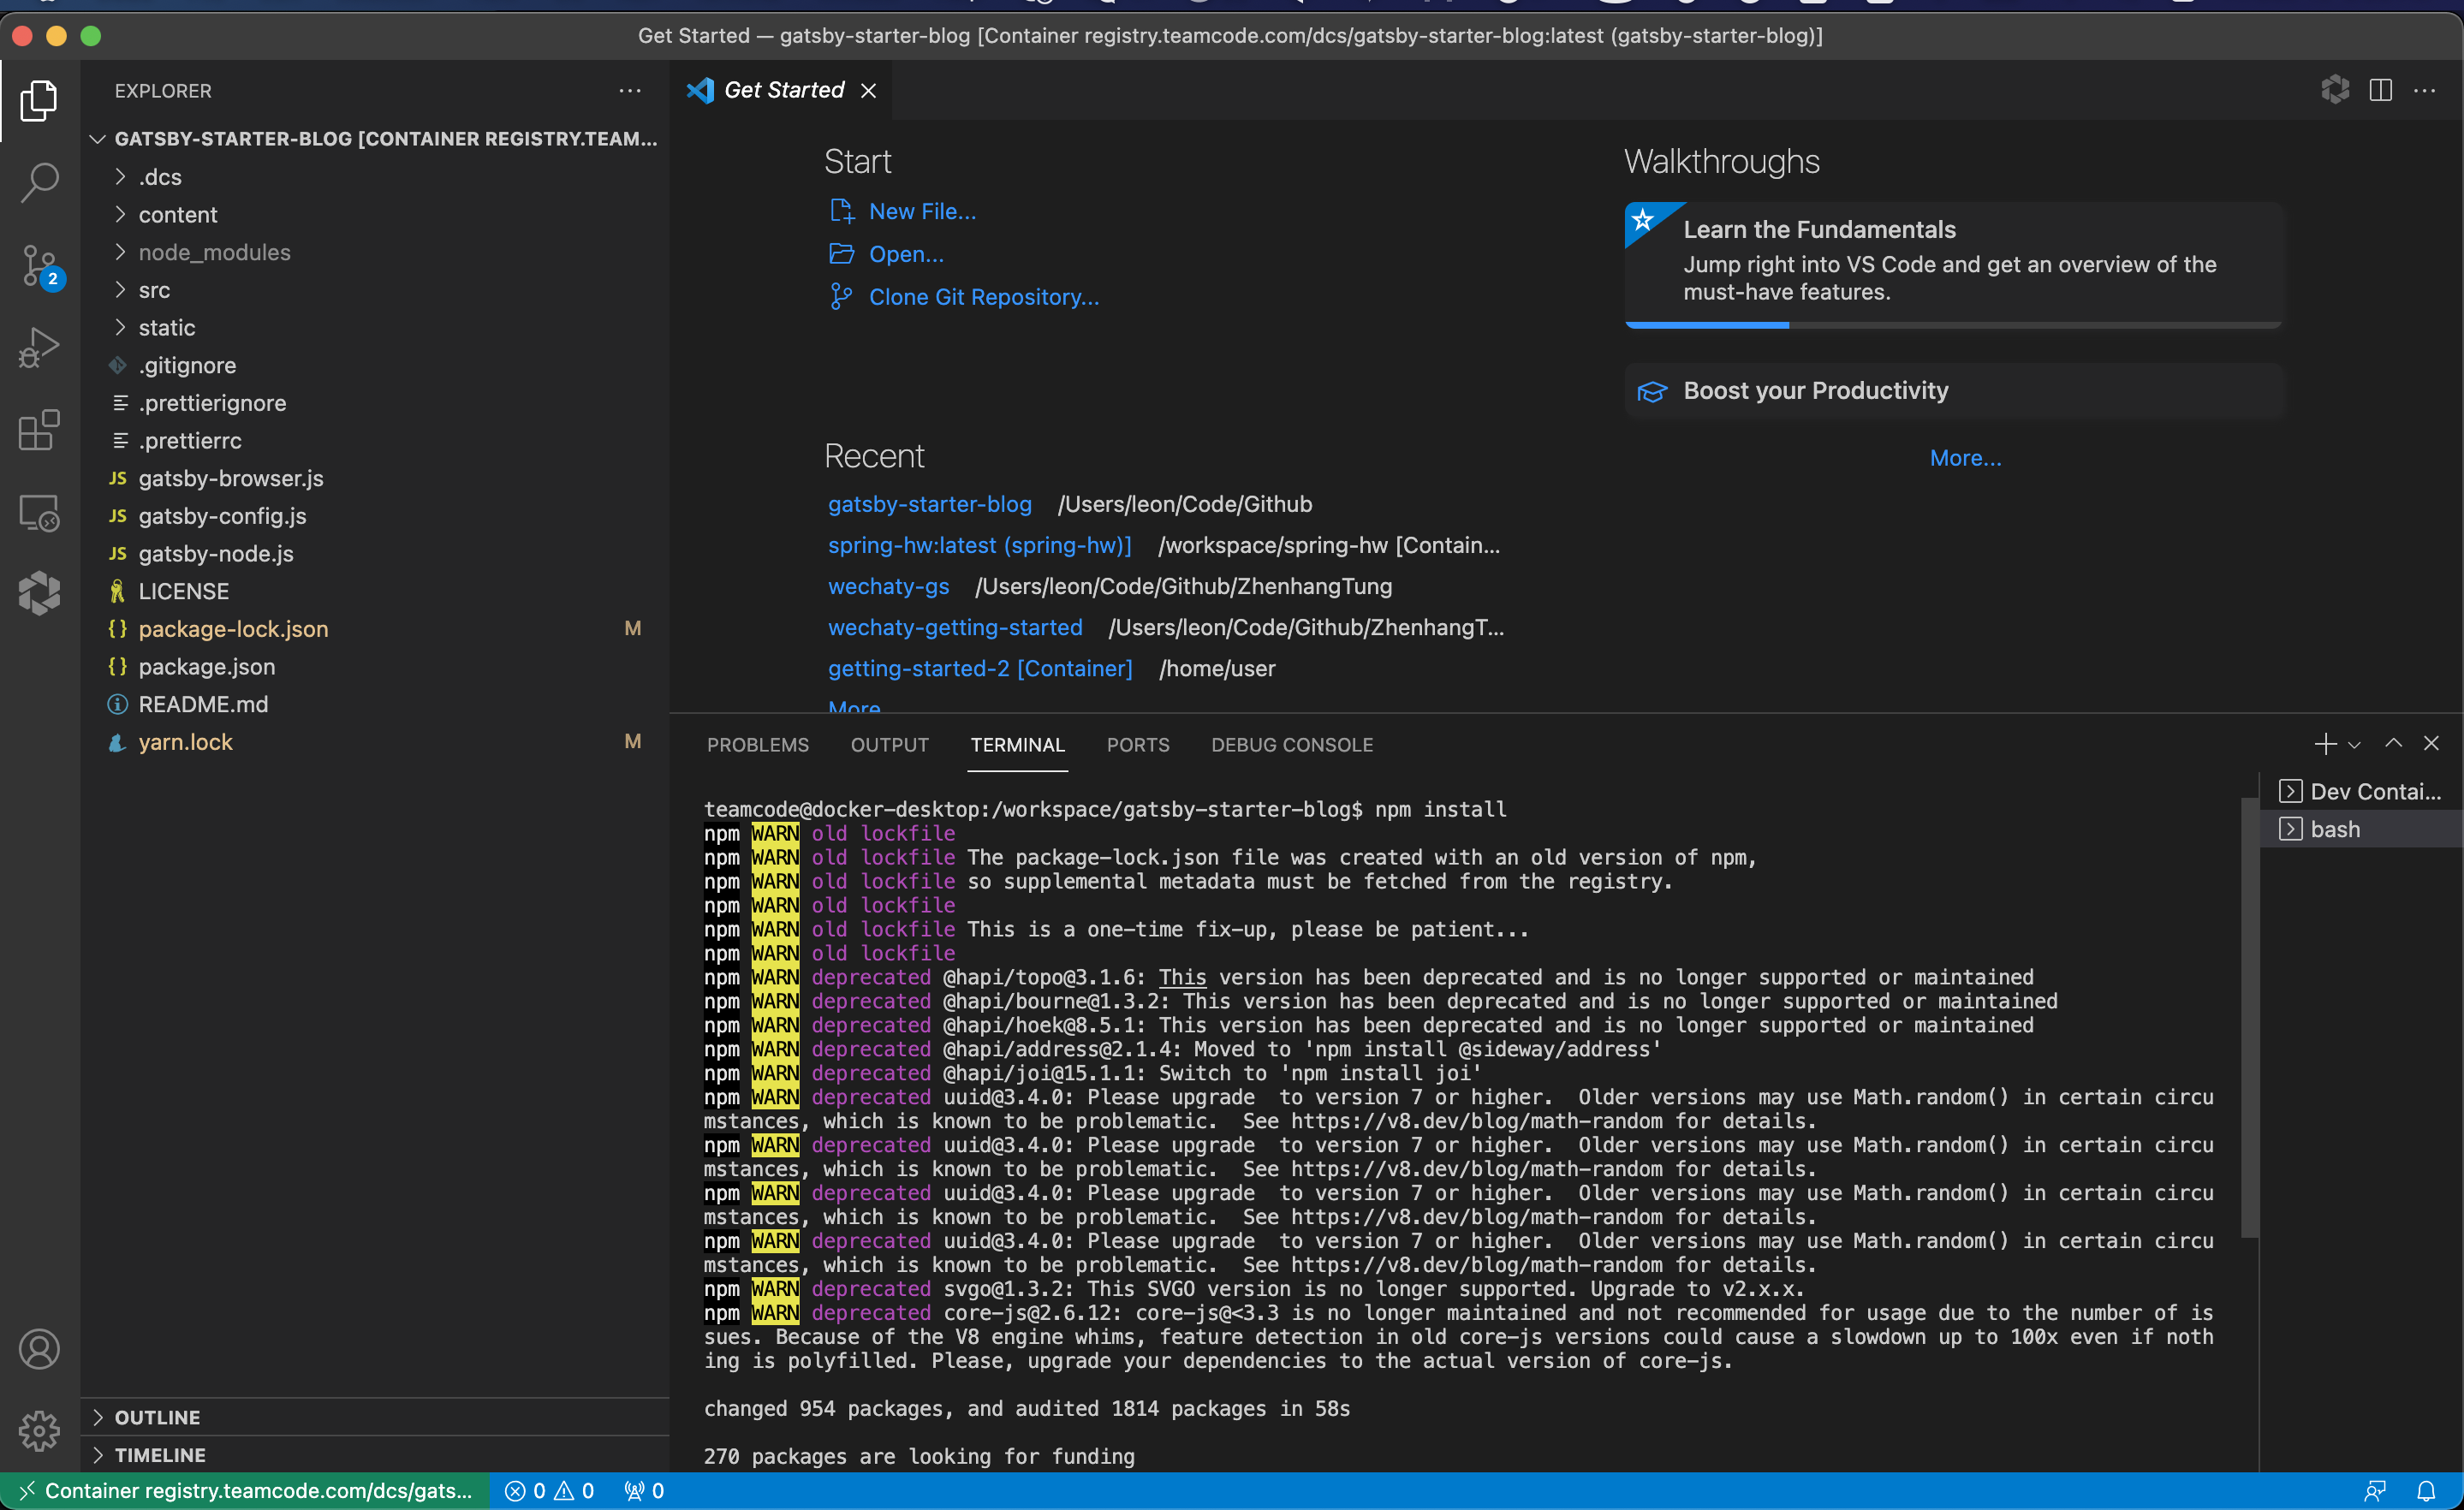
运行npm install安装项目依赖
接着运行npm start启动项目
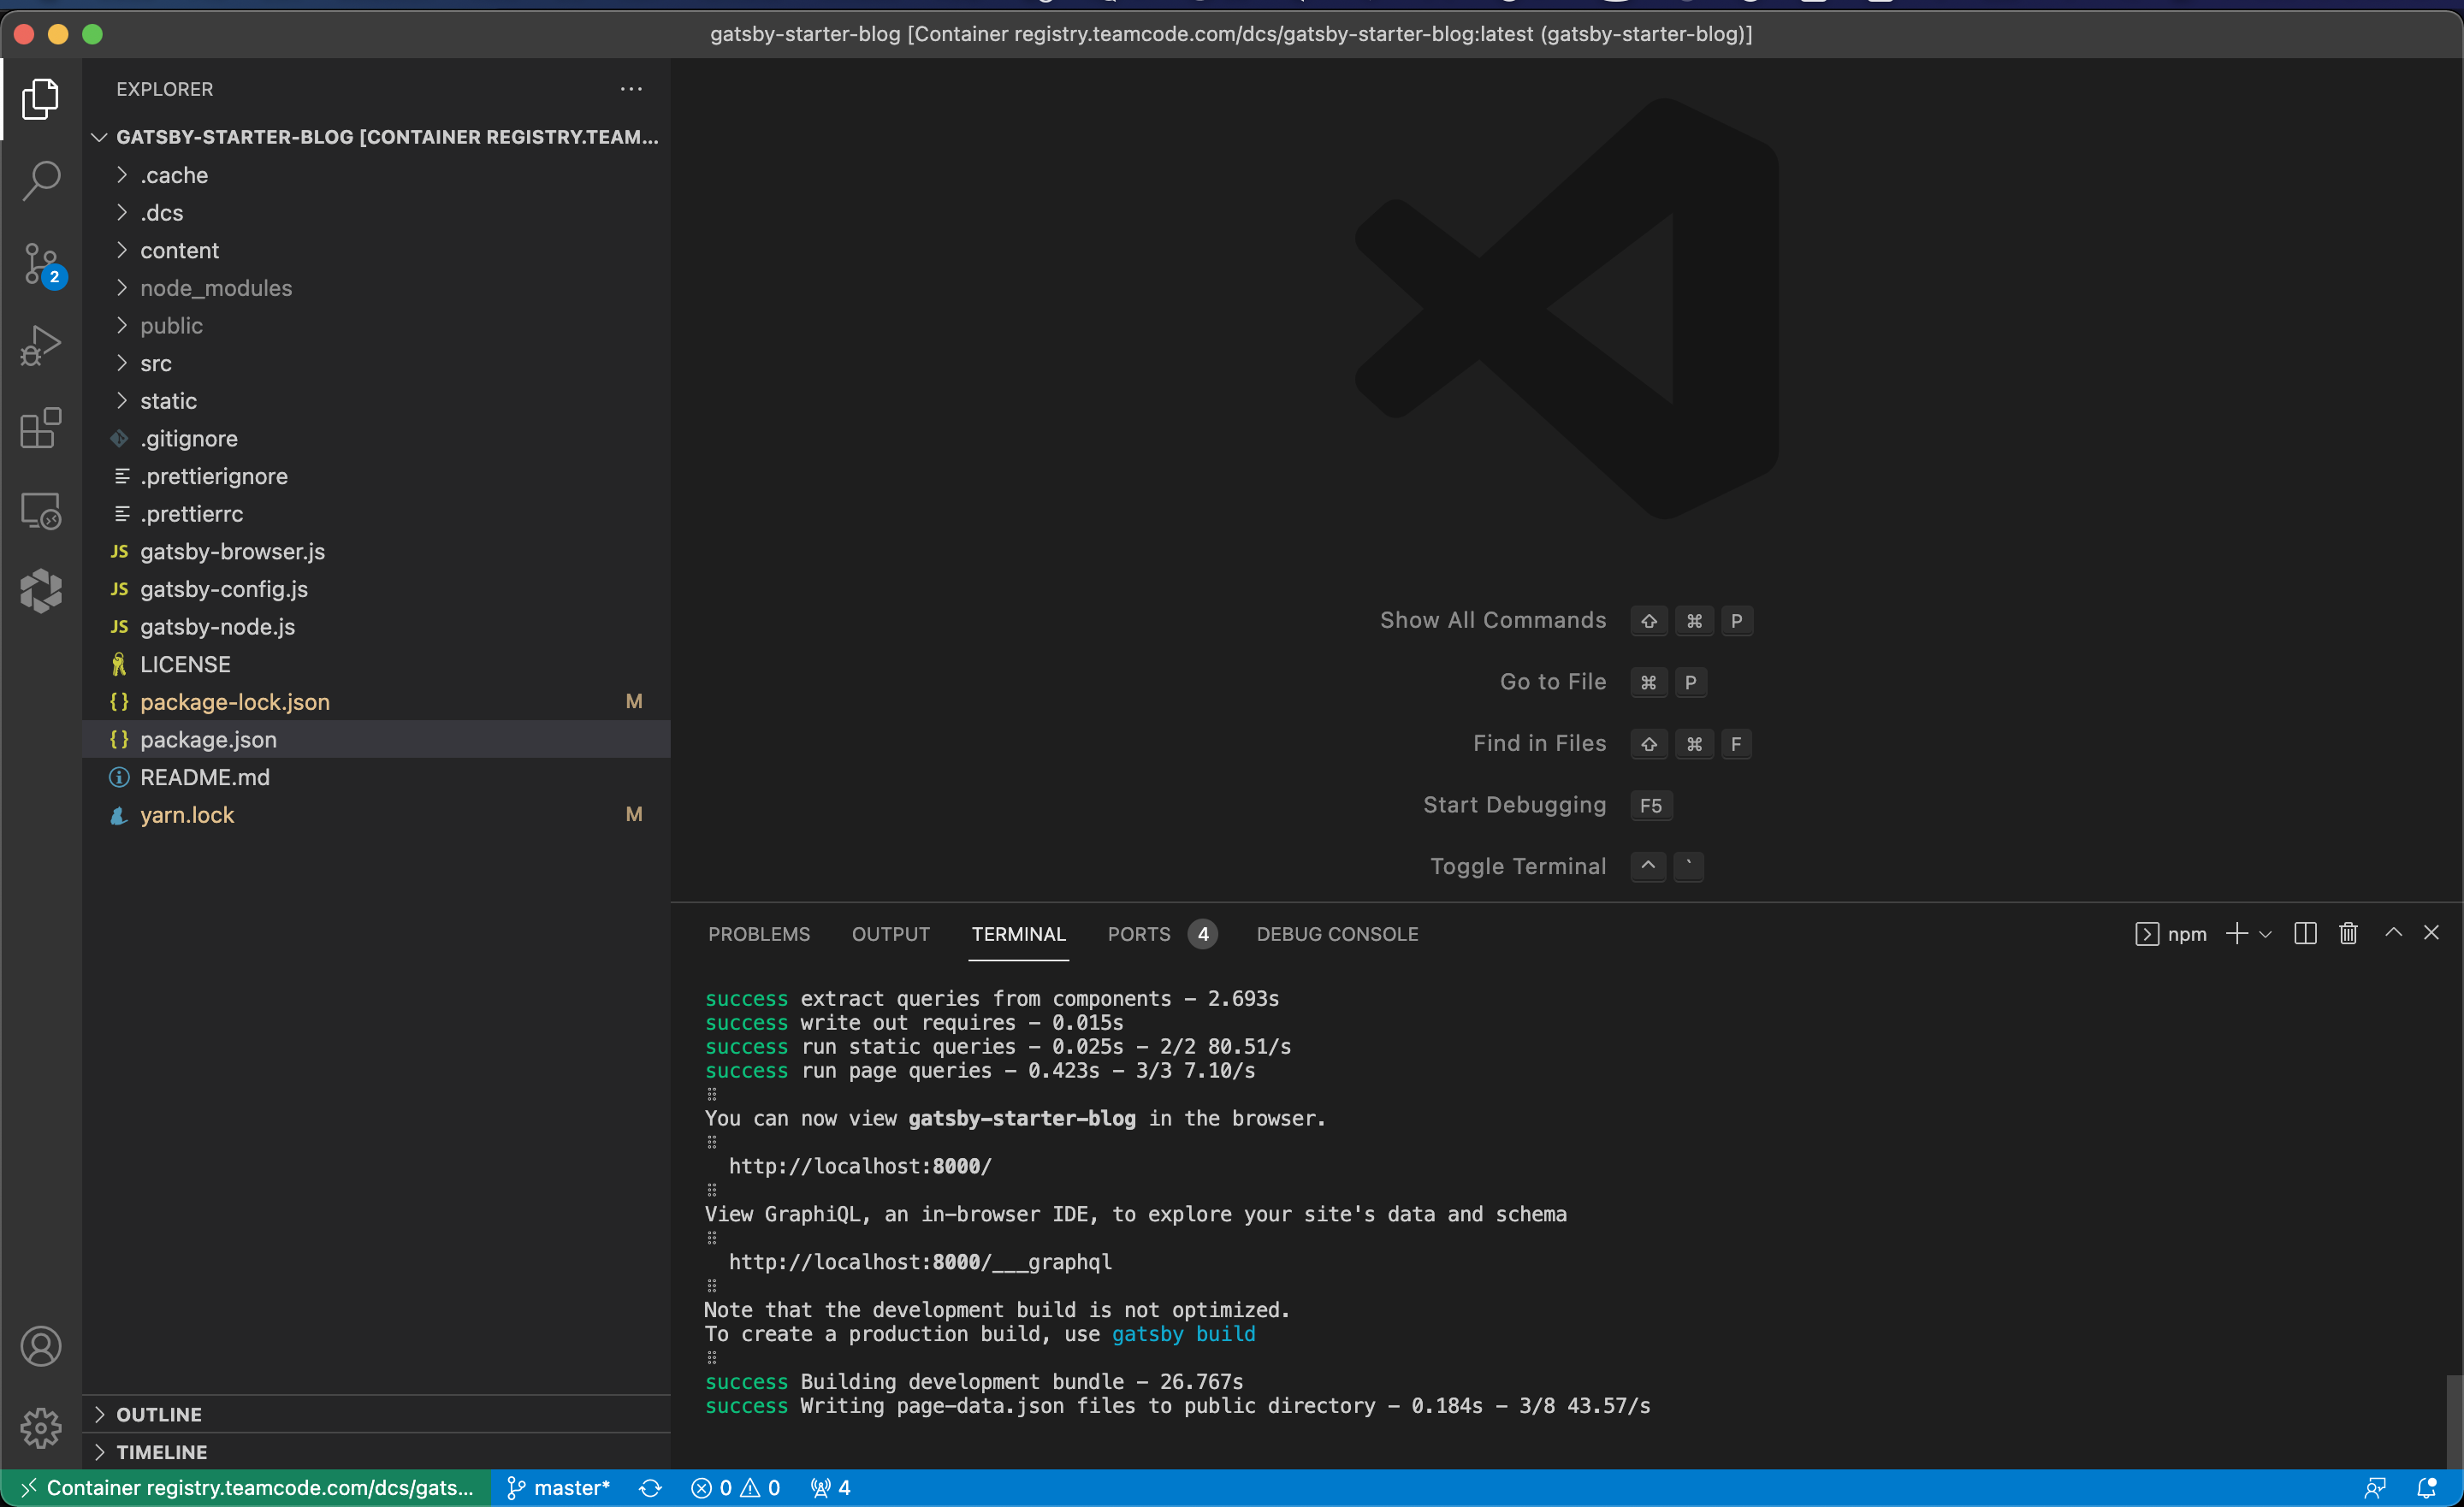
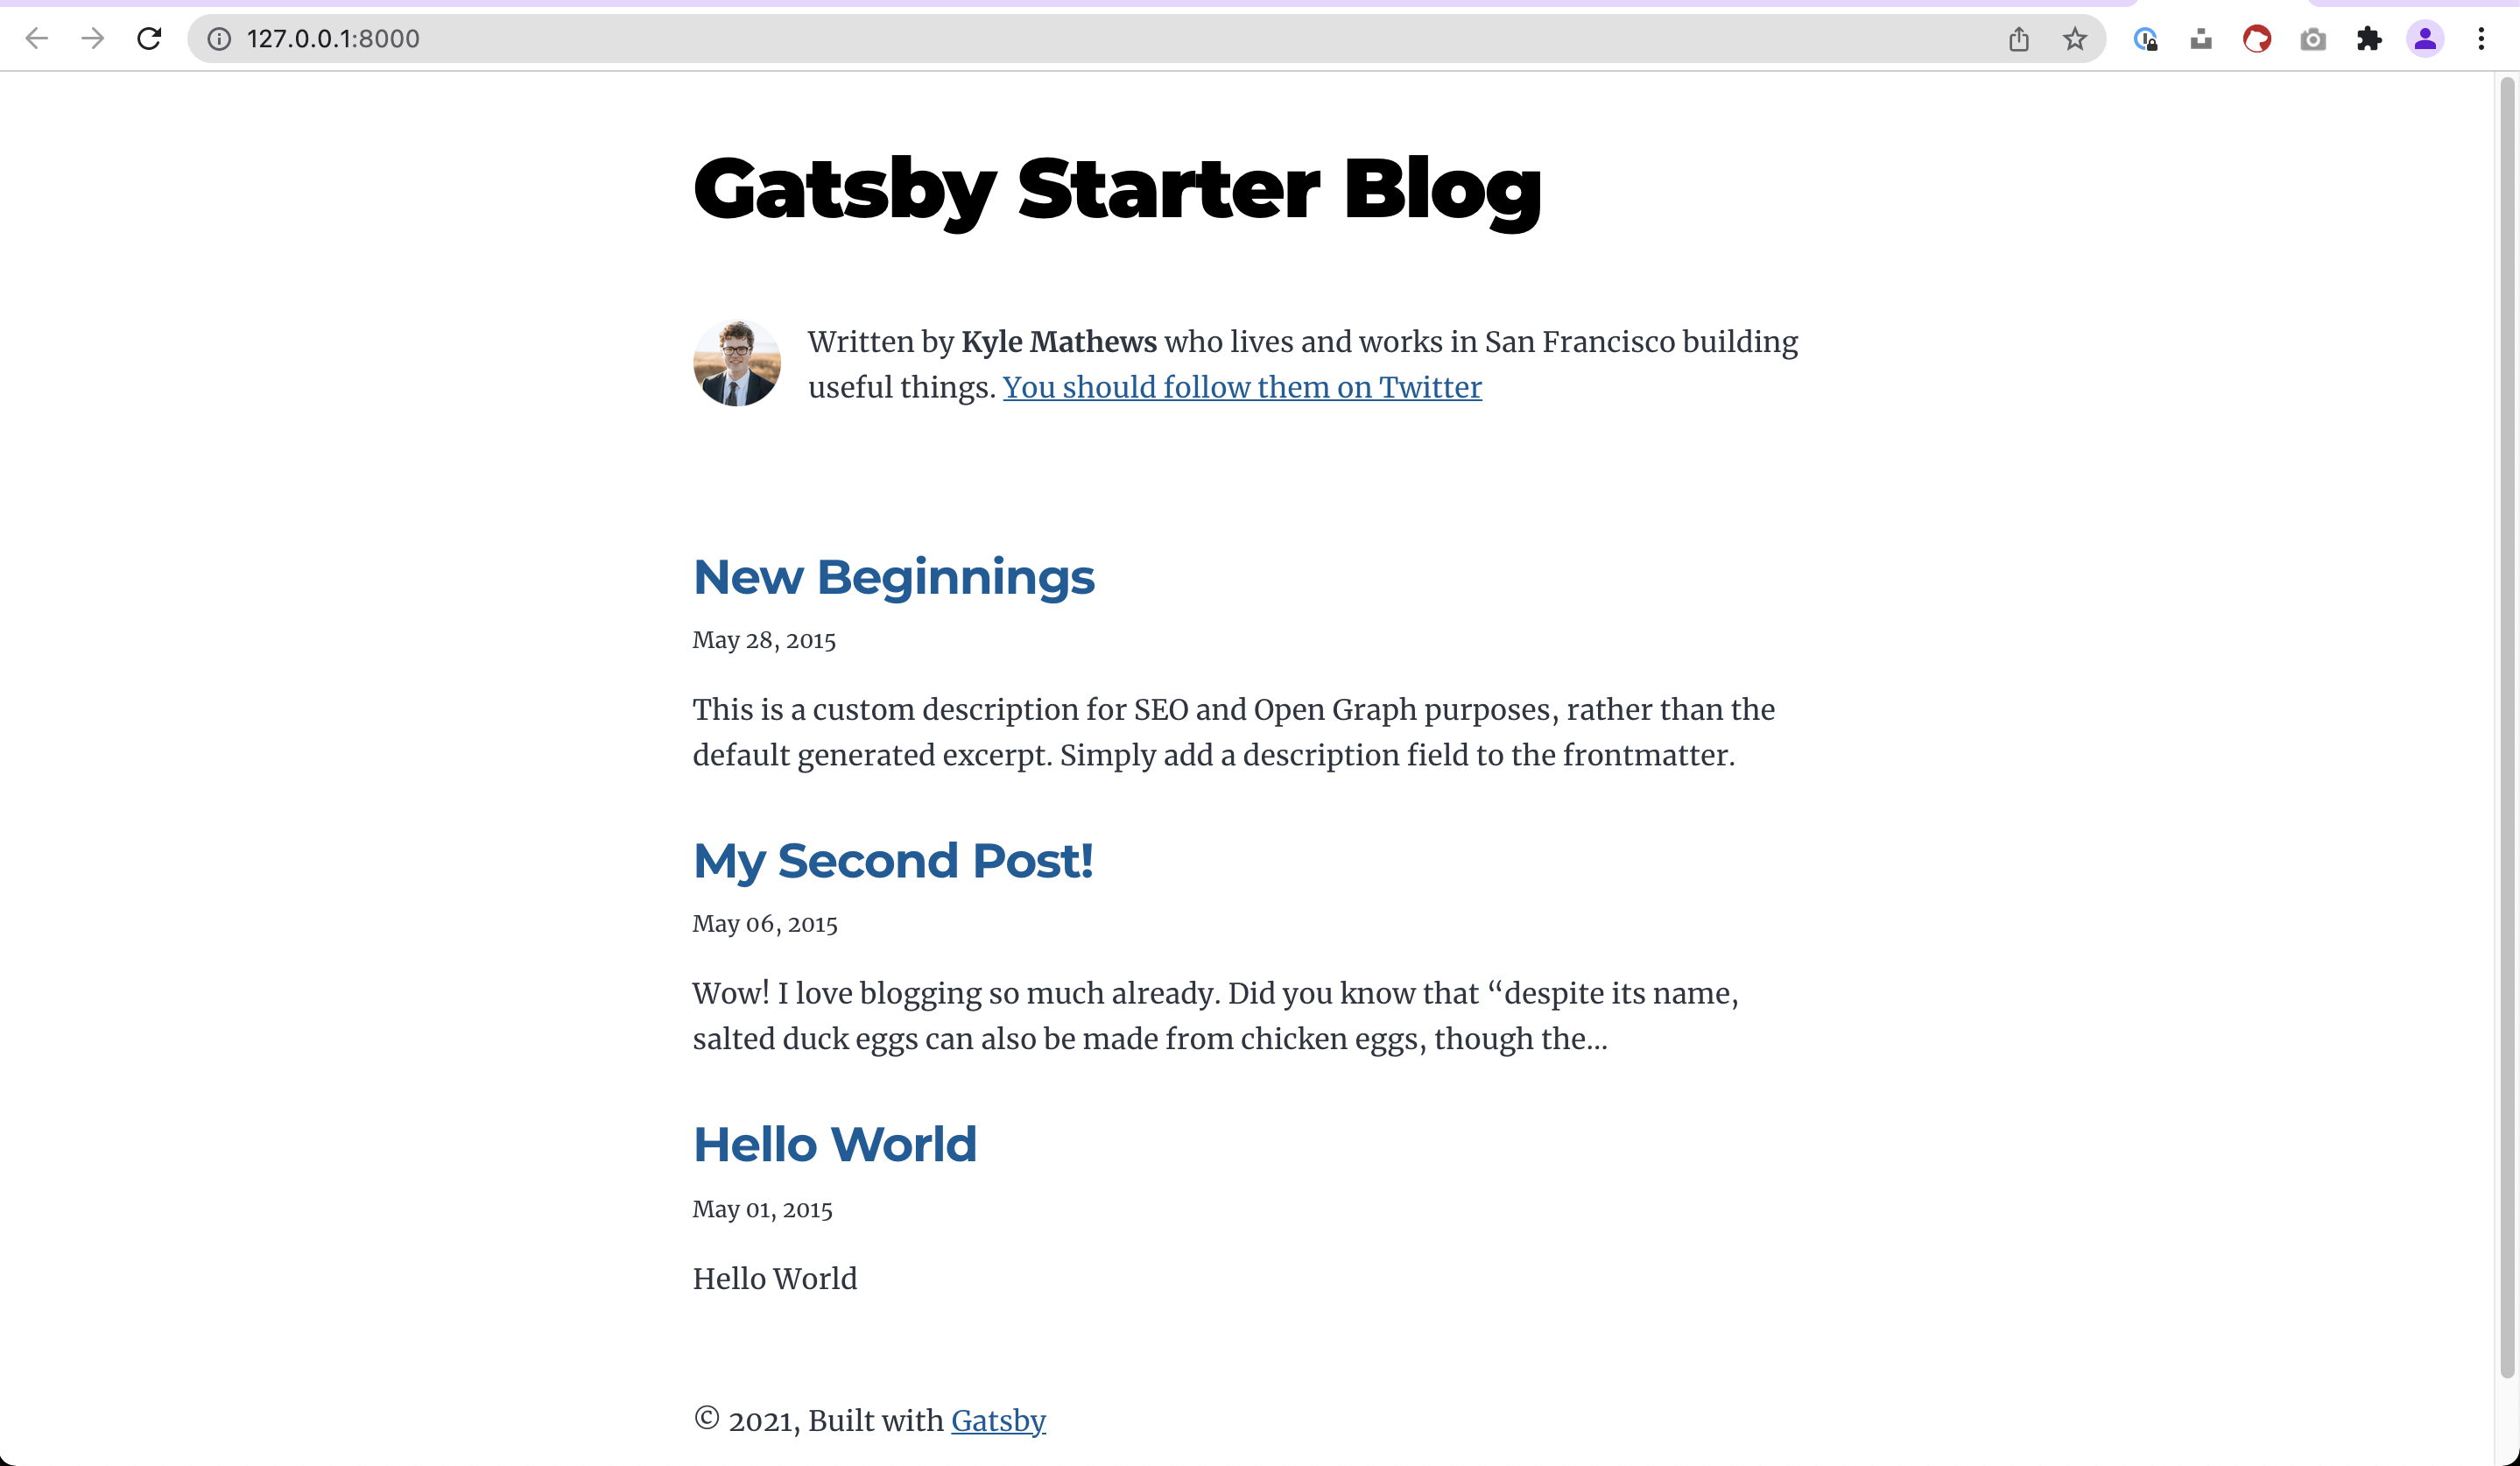
访问页面
打开浏览器访问 http://127.0.0.1:8000/ 即可访问项目首页
暂停开发环境
当你不需要开发的时候,你可以暂停开发环境
$ pylon stop --name=gatsby-starter-blog
删除开发环境
若你不再需要开发你的项目,你可以删除项目的开发环境
$ pylon rm --name=gatsby-starter-blog